- WPW Content Styler
- Get Started
- How to style elements separately
- How to style wordpress page elements
- How to change mouseover style
- How to change wordpress page fonts
- How to style wordpress page conditionally
- How to make website mobile friendly
- What to do if styles do not apply
- How to add CSS code to wordpress theme
Install WordPress plugin WPW Content Styler
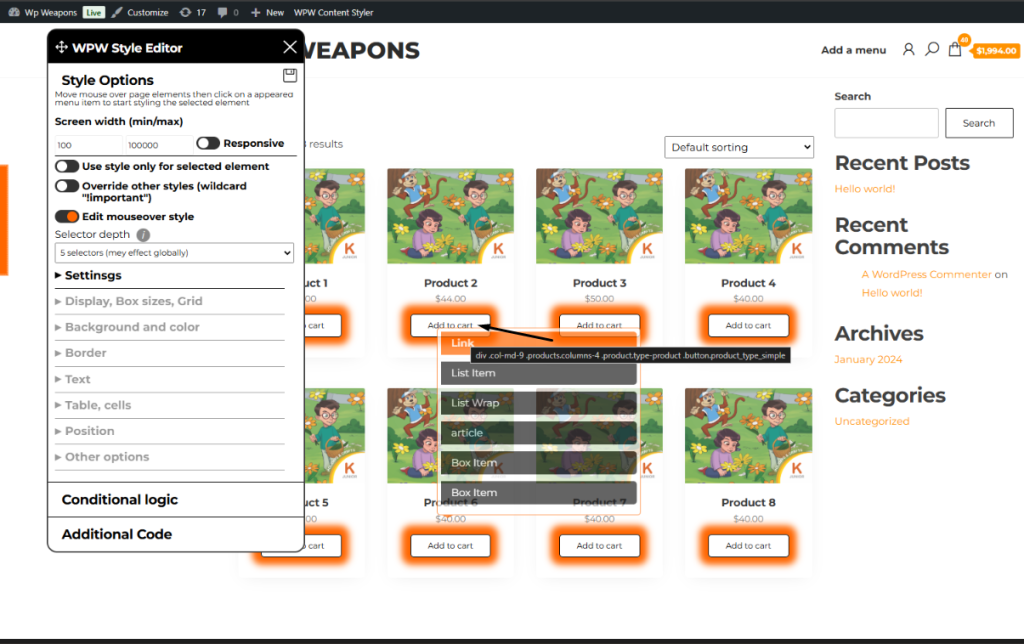
Login as administrator and visit to the page you want to edit style and click on WPW Style Editor button
It will load editor tools widget
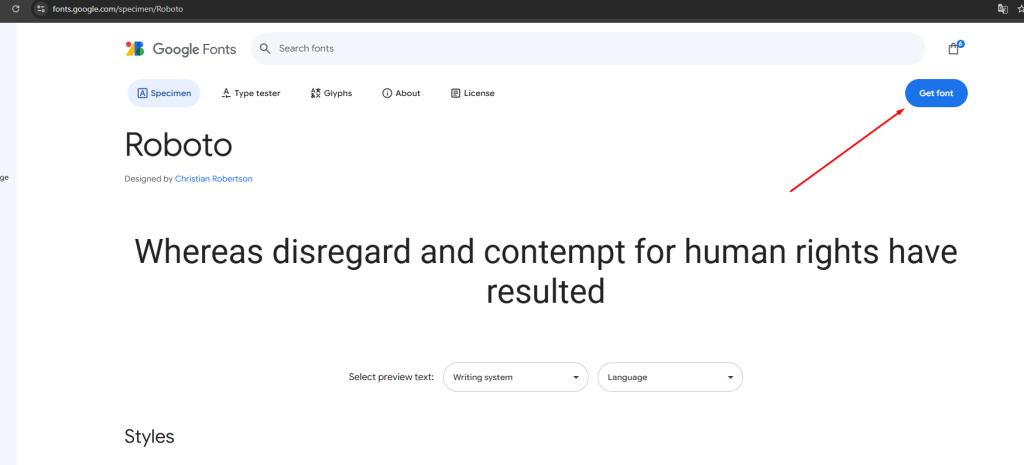
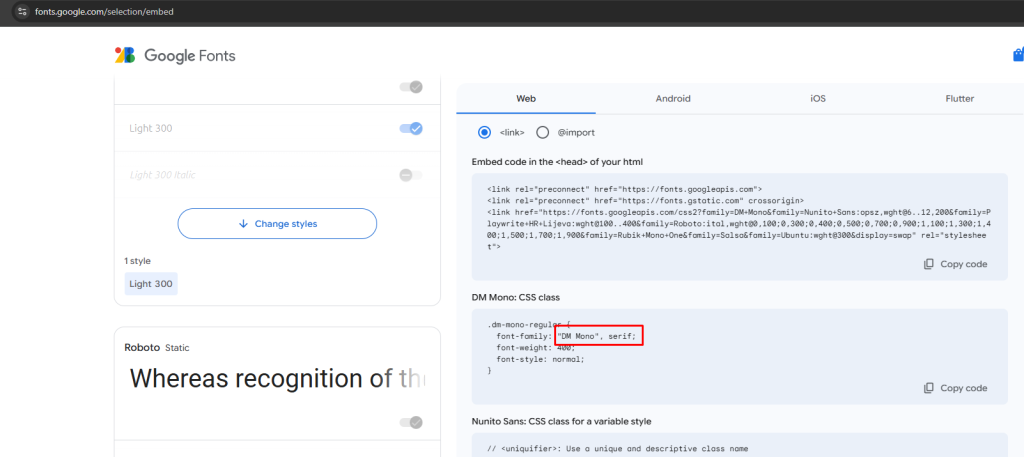
go to fonts.google.com and select a font you like
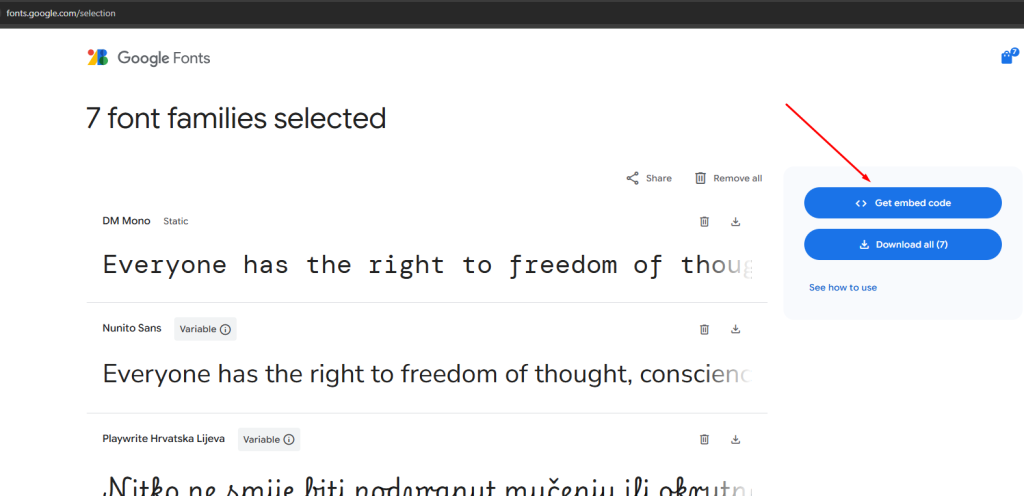
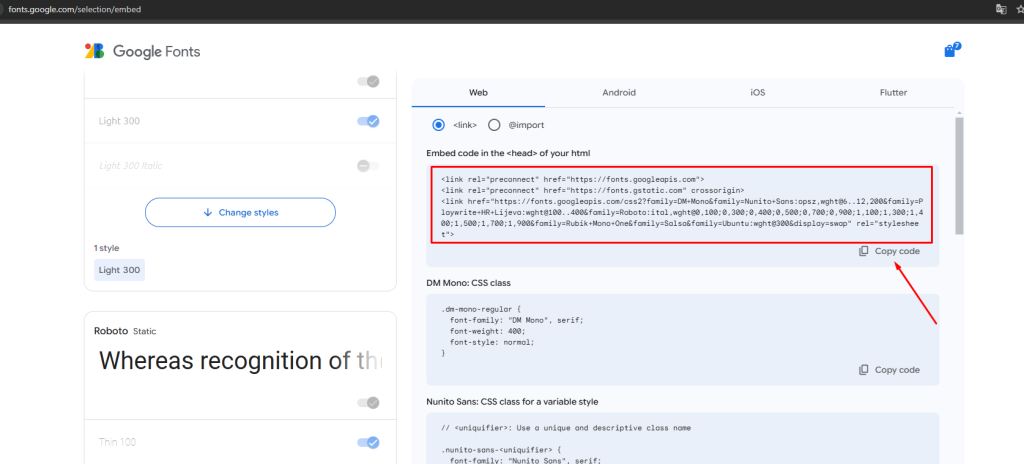
It will open the page where you can copy code which will load fonts
Copy the code pointed on the screenshot above
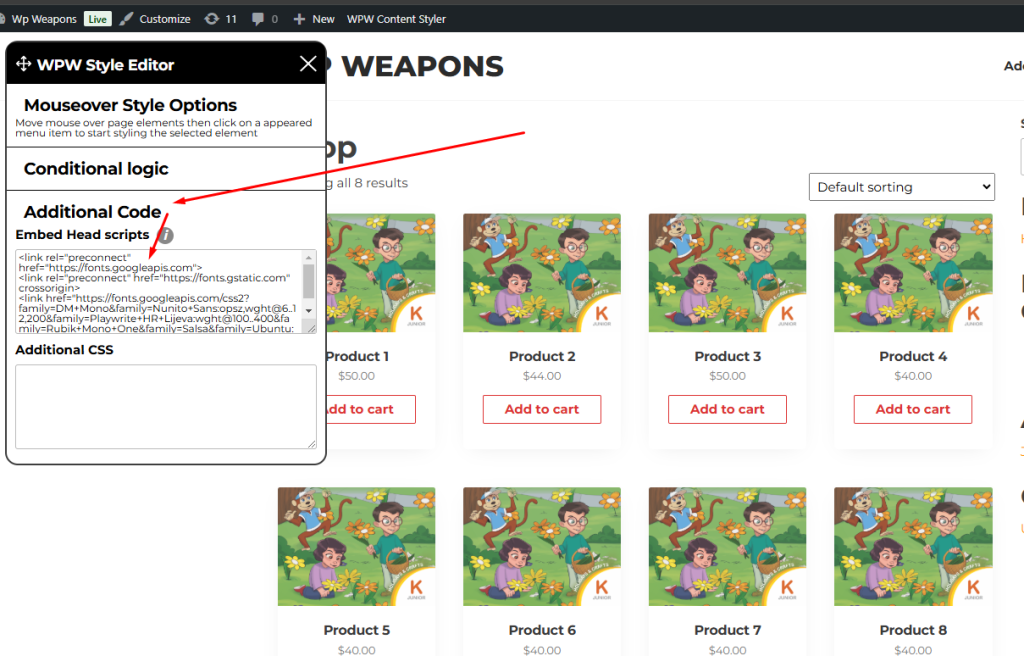
Find “Additional Code” tab on Content Styler widget and click on it
Find “Embed Head scripts” field and paste it there
It is time to add font name to elements style
Go back to fonts.google.com tab on your browser and find the right font name like on the sccreenshot bellow
Cope only the part pointed on the above screenshot, without “font-family:” go back to your website to change font via the Content Styler widget , move mouse to the element you want and click on the menu item you prefer, mainly it is the first menu item
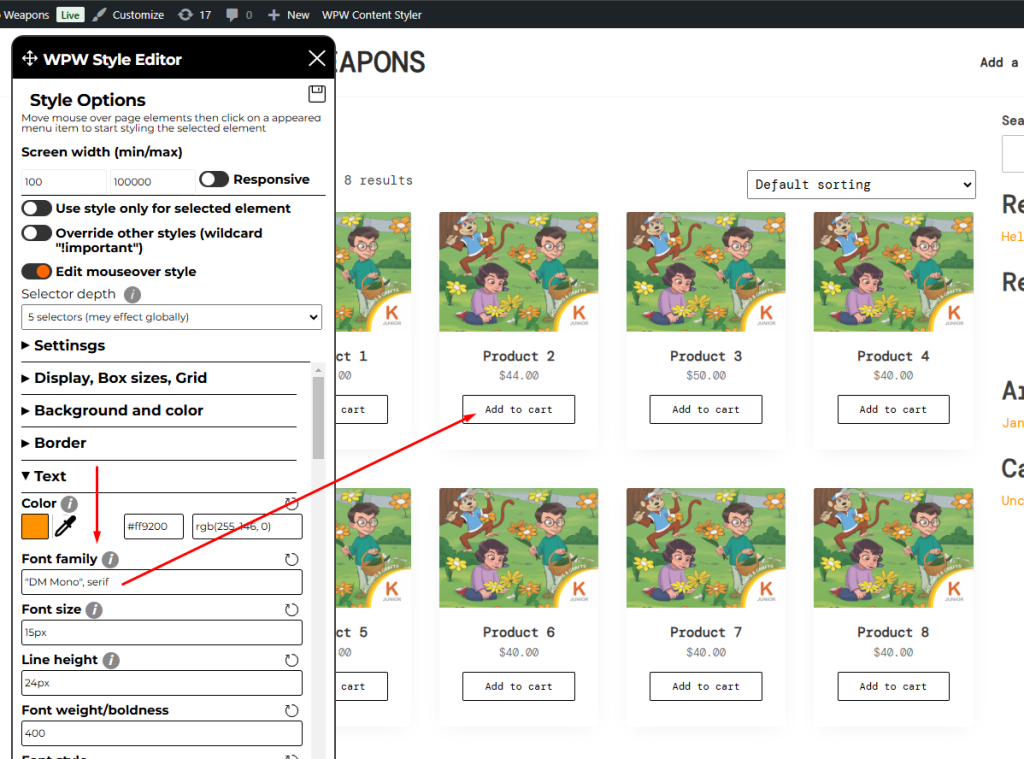
It will open “Text” tab after click
Find “Font family” field and pase the font name you copied from fonts.google.com
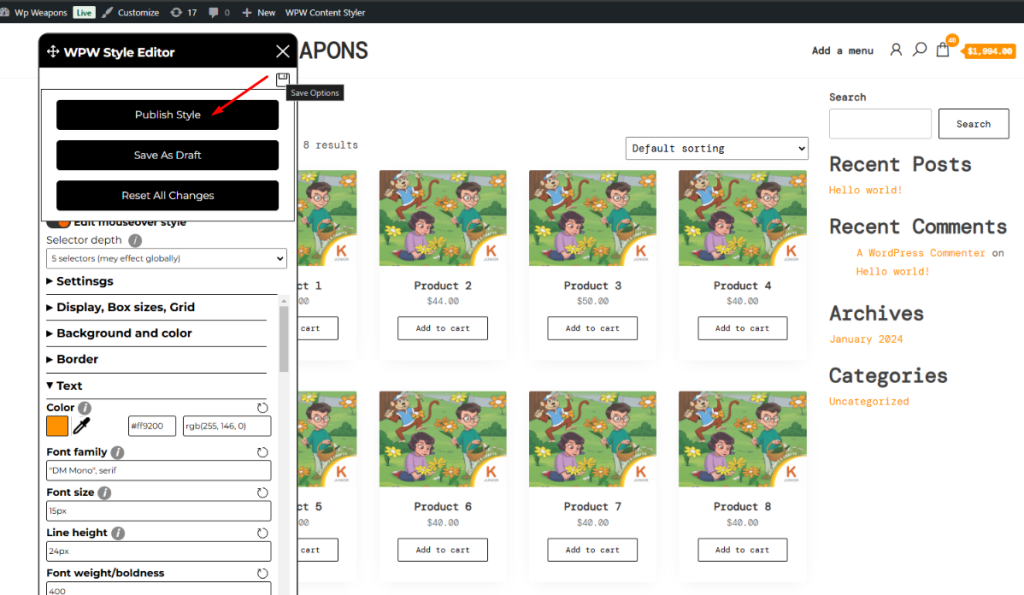
It is is time to save changes. Find “Save” icon at the top of editor widget and move mouse on it, There are the following button
- Publish style
- Save as draft
- Reset all changes
That is is, enjoy !!!

